Sign in, find your projects, your work and your notifications, and get around the menu.
Finding your way around
WhereLeft side of every screen
PlanAll plans
WhoEveryone
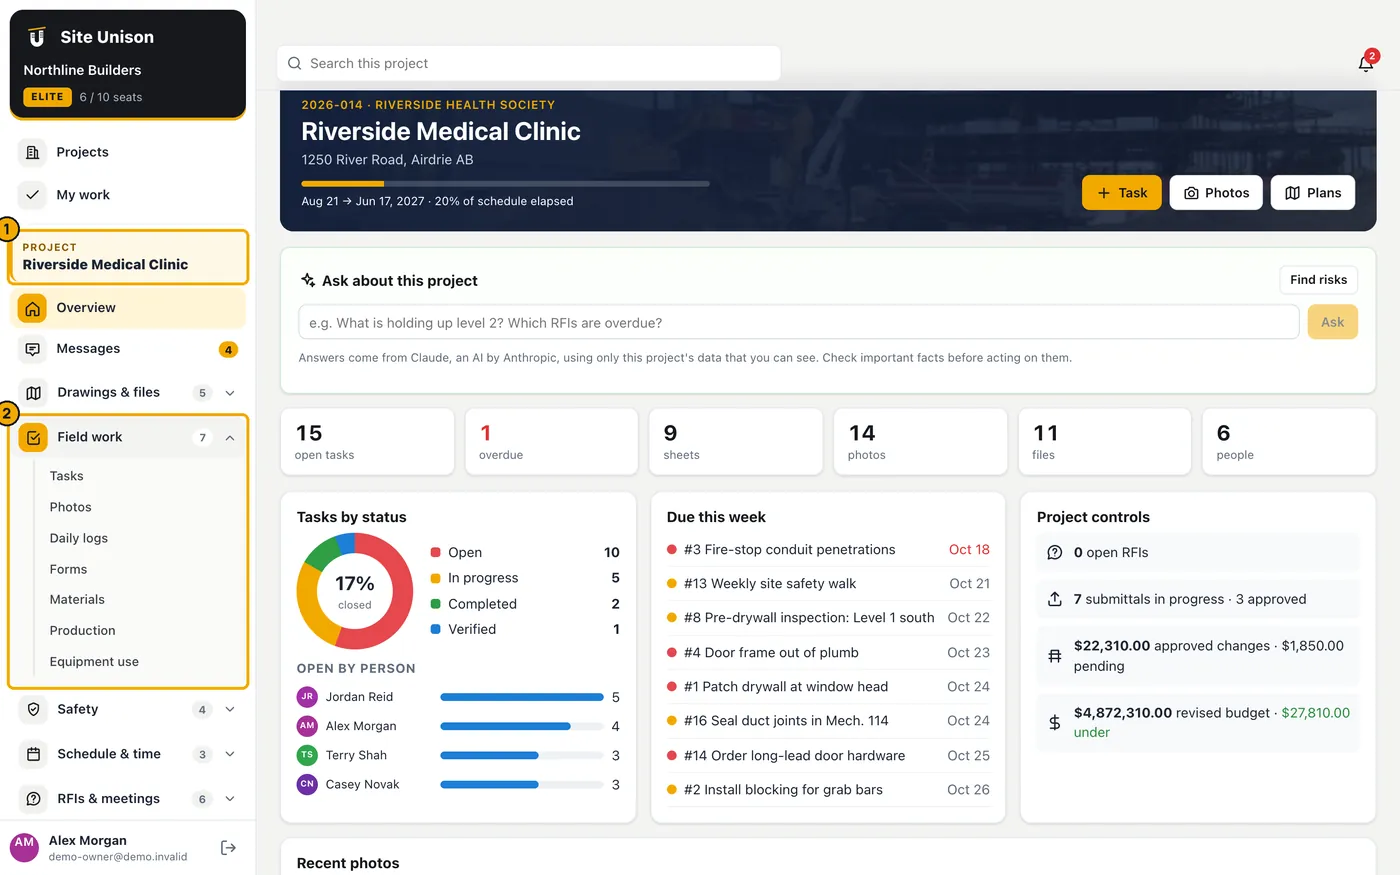
The menu on the left is organised the way a job runs. Projects and My work are always at the top. When you open a project, its name appears in a yellow card, with Overview and Messages underneath, and then the sections: Drawings & files, Field work, Safety, Schedule & time, RFIs & meetings, Finances and Project.
Each section opens like an accordion. Only one is open at a time, and the section holding the screen you are on opens by itself, so the menu never gets long. The number beside a section is how many screens are inside it for your role. On a phone, tap the menu button at the top left to open the menu.
How to use it
Tap a section name, for example Field work, to open it. Tap it again to close it.
Pick a screen inside the section. The current screen is shown in black with a yellow dot.
Company at the bottom holds your company settings, people, company tools and your plan.
Screens you cannot use with your role are not shown. Screens in a higher plan show a small lock; tapping them explains what the plan adds.
Projects
WhereMenu → Projects
PlanAll plans
WhoEveryone
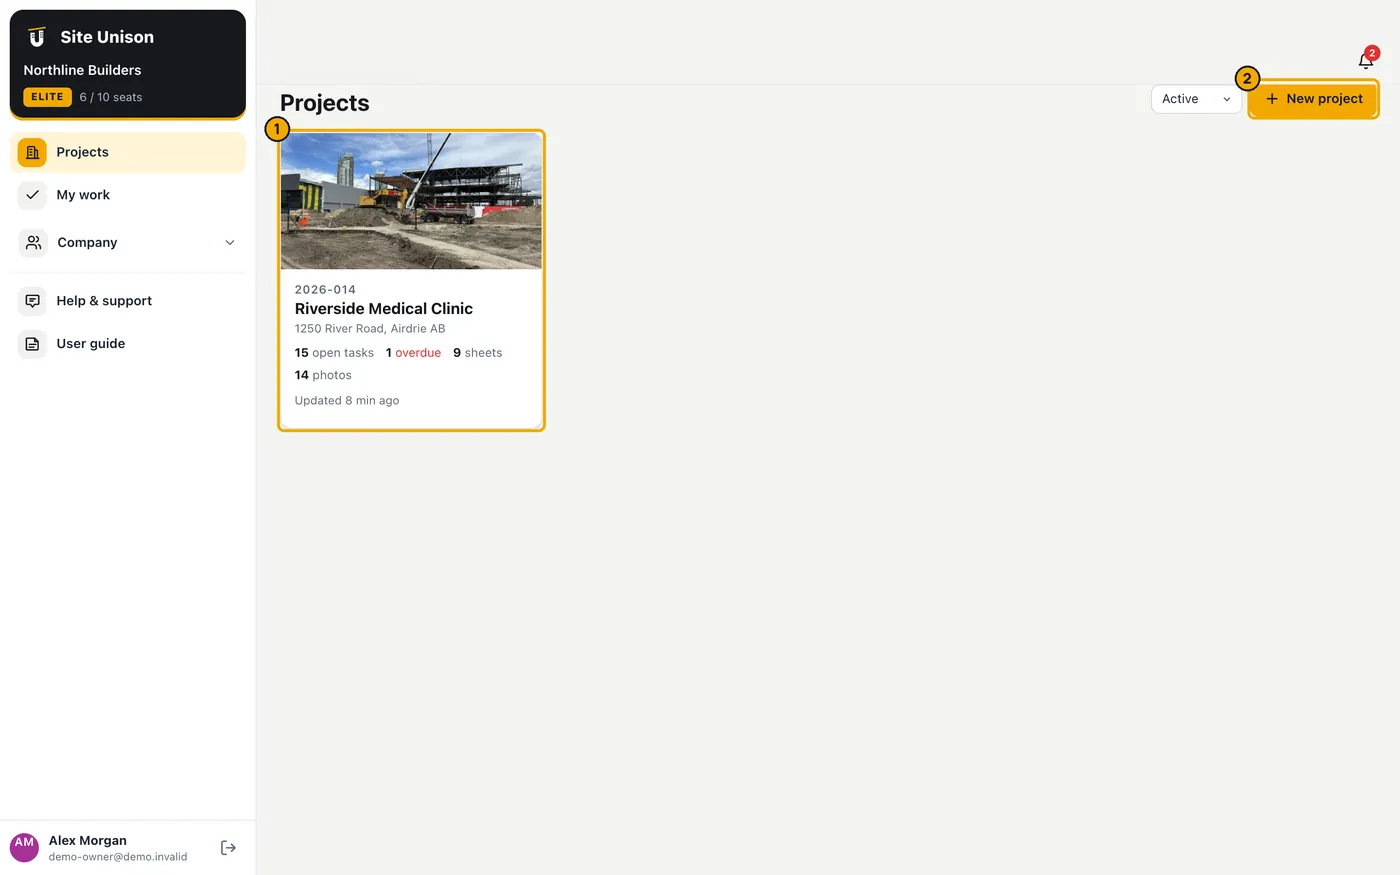
Projects lists every job you are on, with the cover photo, open and overdue tasks, sheets and photos. The owner sees every project in the company; everyone else sees the projects they were added to.
How to use it
Open Projects. Use the drop-down to show active, archived or all projects.
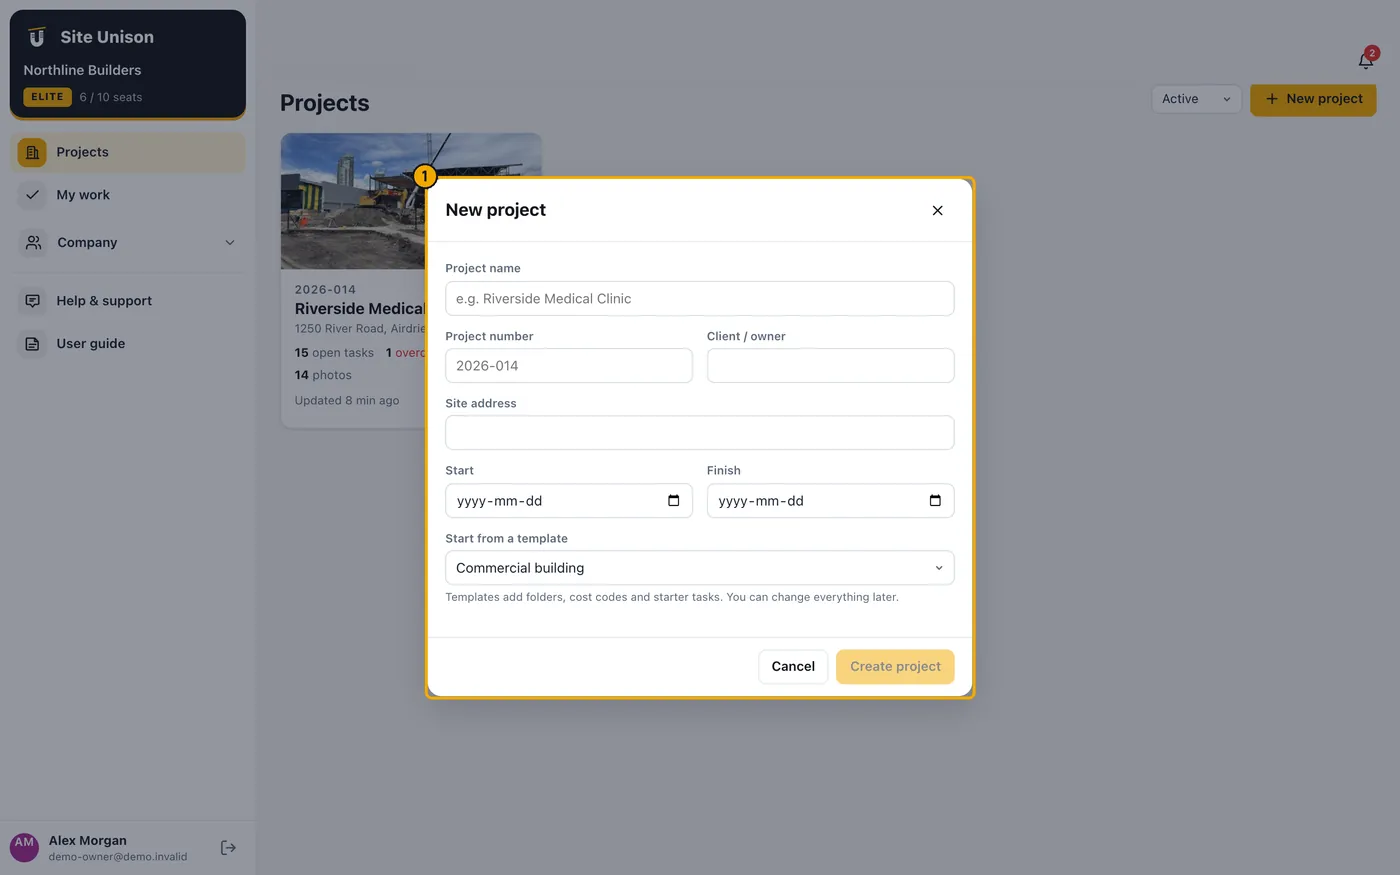
Owners and project managers click New project, enter the name, number, address and dates, and choose a template. Templates add folders, budget divisions and checklists for that kind of job.
Click a project card to open it. The menu changes to show that project.
New companies can install a complete sample project from the yellow banner (or Company → Sample data) and remove it with one click later.
My work
WhereMenu → My work
PlanAll plans
WhoEveryone
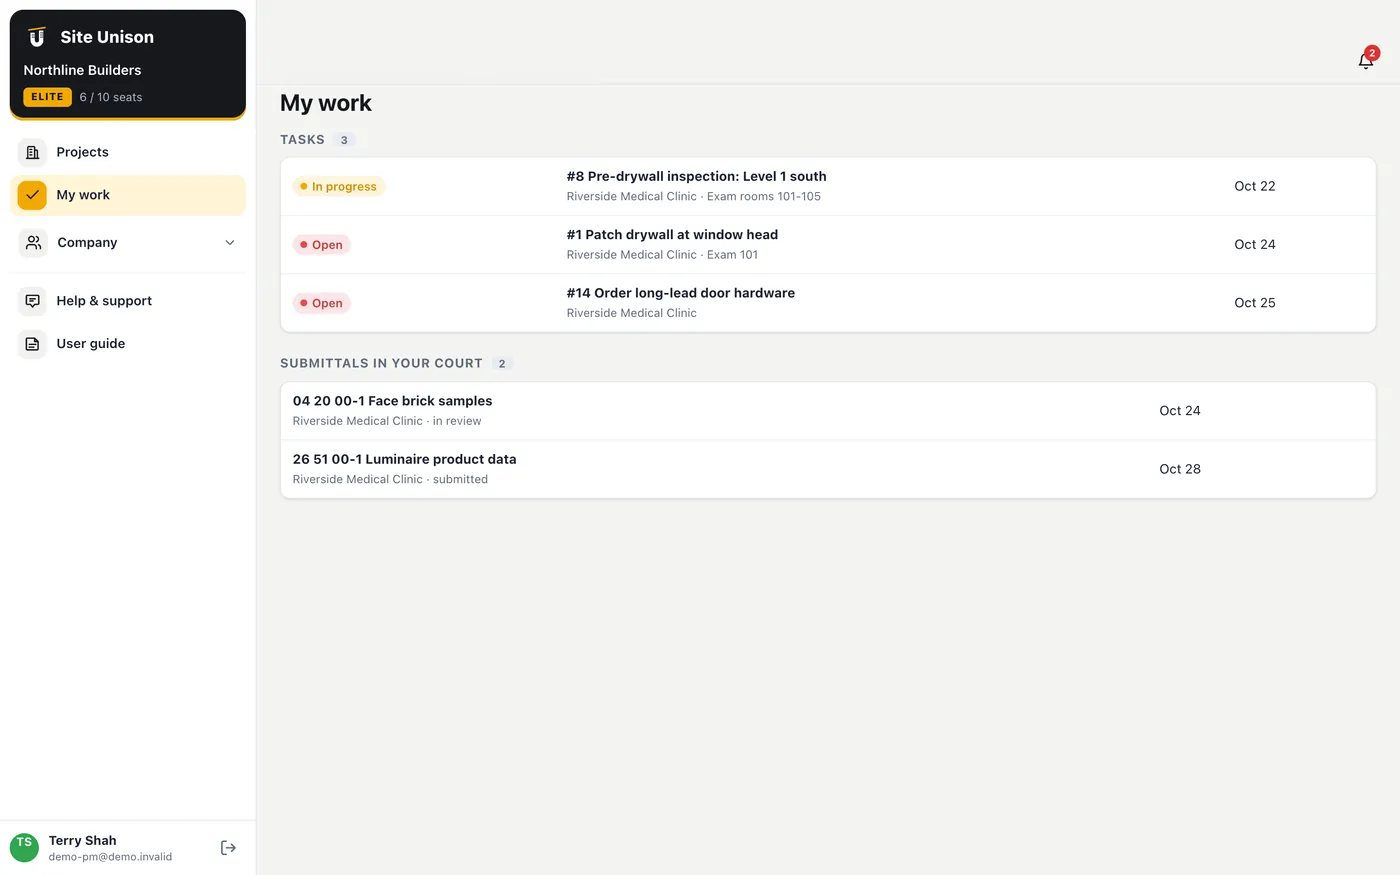
My work collects everything assigned to you across all projects: tasks, RFIs where the ball is in your court, submittals to review and items due soon, so you can start the day from one list.
How to use it
Open My work. Items are grouped by what needs doing first: overdue, due this week, later.
Click an item to open it in its project.
Notifications and search
WhereBell icon and search box at the top
PlanAll plans
WhoEveryone
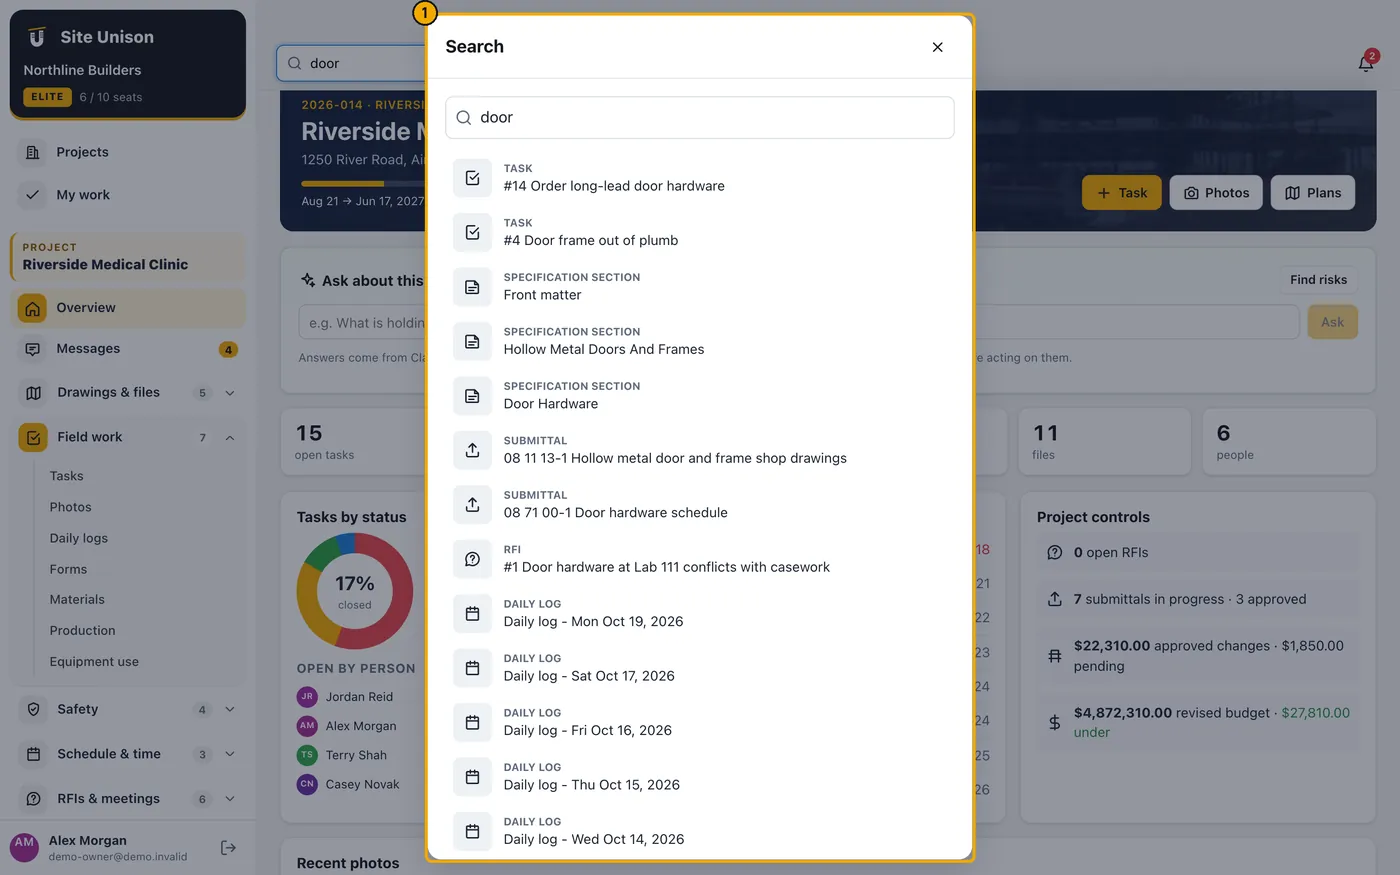
The bell at the top right shows when someone assigns you work, mentions you in a chat, answers your RFI, gives you access to a screen or when an item needs you. The search box at the top searches the open project: tasks, sheets, files, photos, specifications, RFIs, submittals, change orders, forms and logs.
How to use it
Click the bell to see your notifications. Click one to open the item.
Inside a project, type in Search this project and press Enter. Click a result to open it.
Project overview
WhereProject → Overview
PlanAll plans
WhoEveryone except employees and contractors
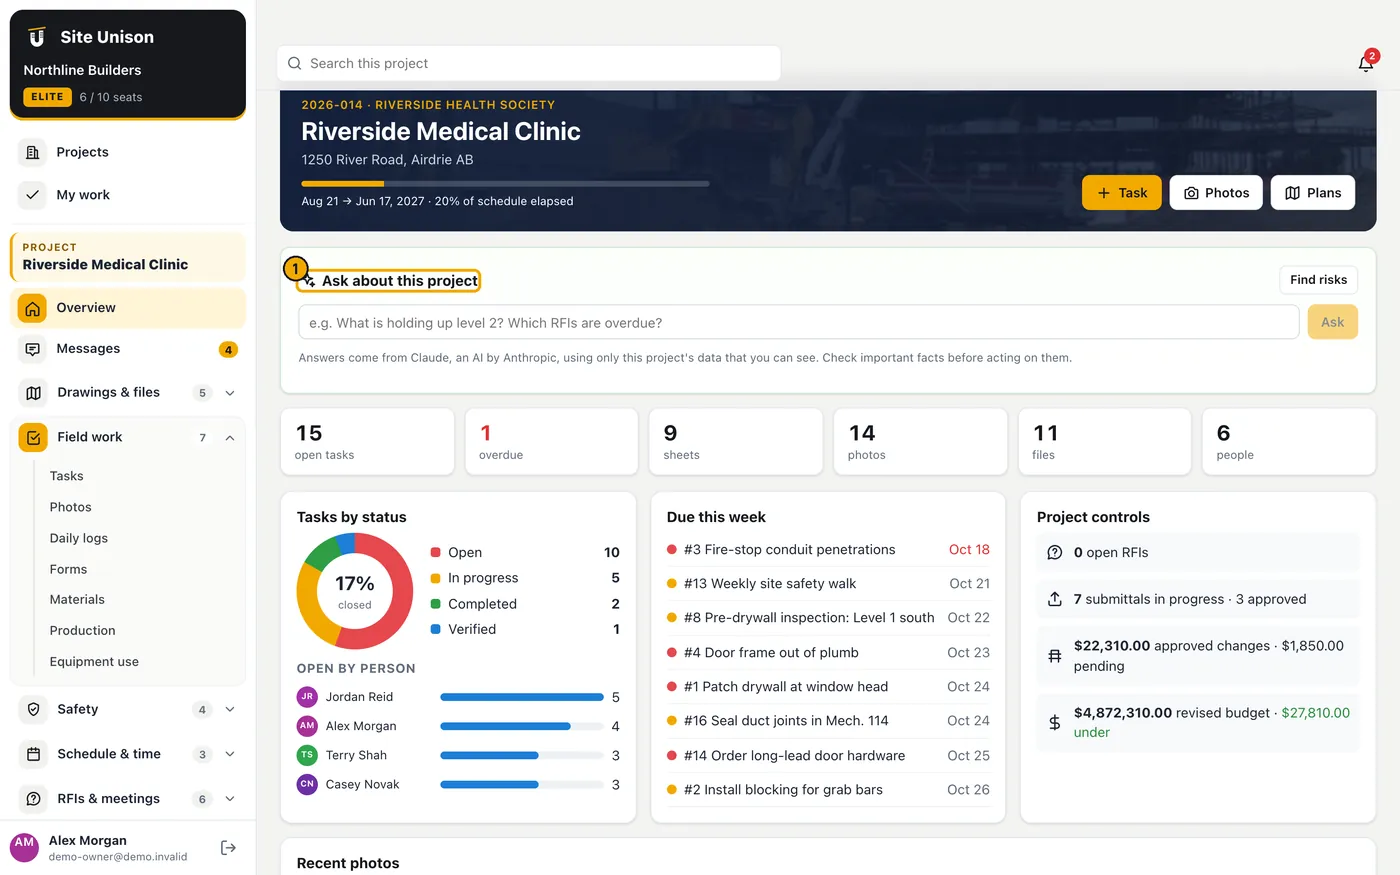
The overview is the project dashboard: open and overdue tasks, tasks by status and by person, what is due this week, project controls (RFIs, submittals, approved changes and the budget for those who can see finances), recent photos and activity. On Elite, once the company owner has added an AI key (see Connections & setup), the AI assistant box answers questions about the project.
How to use it
Open the project. The overview opens first.
Use the buttons in the header to add a task, photos or open the plans.
On Elite, type a question in Ask about this project, for example "What is late on the critical path?", or click Find risks.
Messages (project chats)
WhereProject → Messages
PlanPro and Elite
WhoEveryone; guests only in chats they are invited to
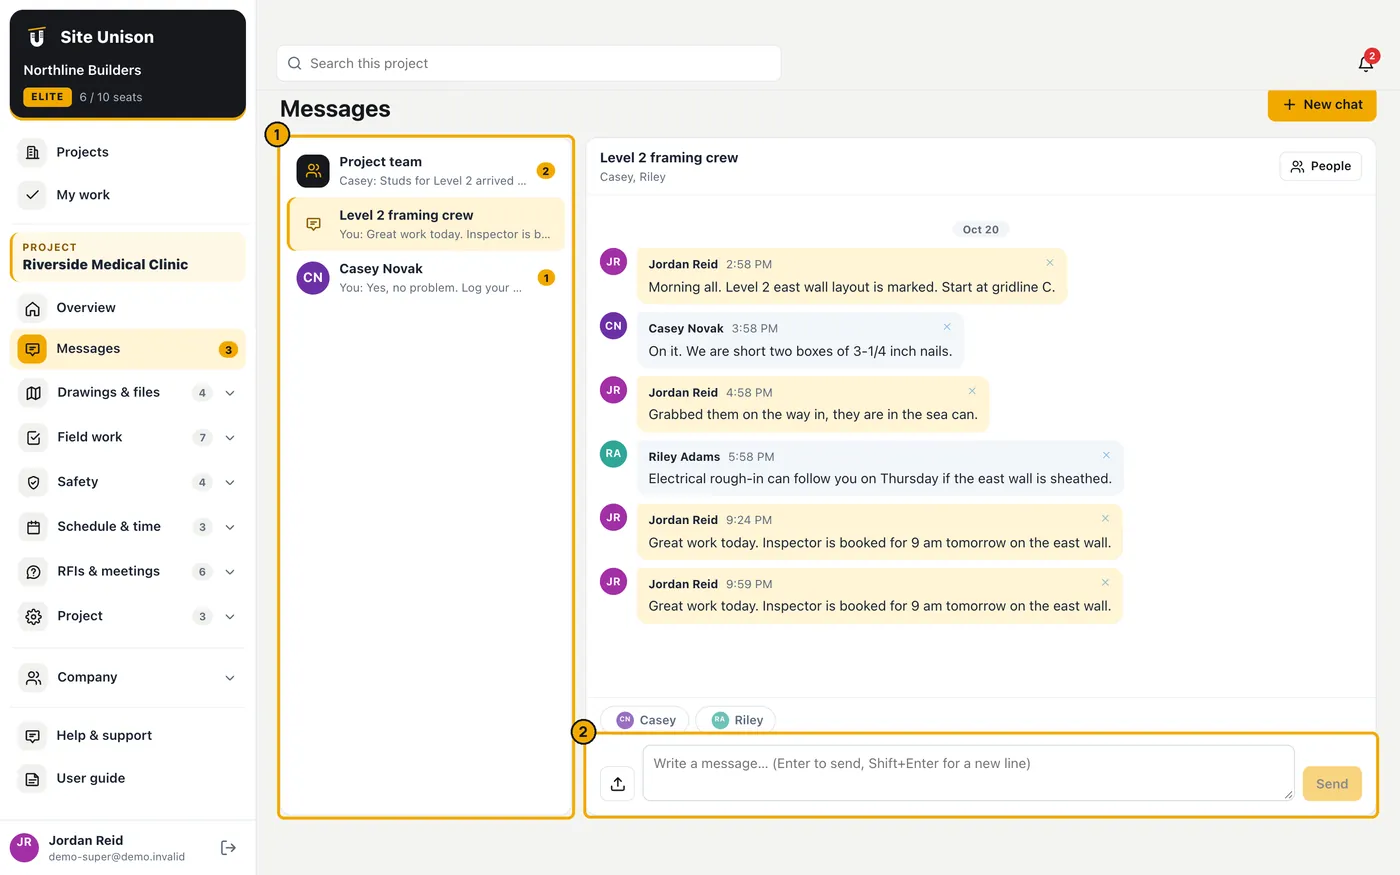
Every project has a team chat for everyone except guests, plus group and private chats. Who can message whom follows the roles: the owner, project managers and superintendents can chat with anyone on the project; employees and contractors can chat with each other and with superintendents; guests only see chats they were invited to.
How to use it
Open Messages. Your chats are on the left: the project team chat, groups and private chats, with unread counts.
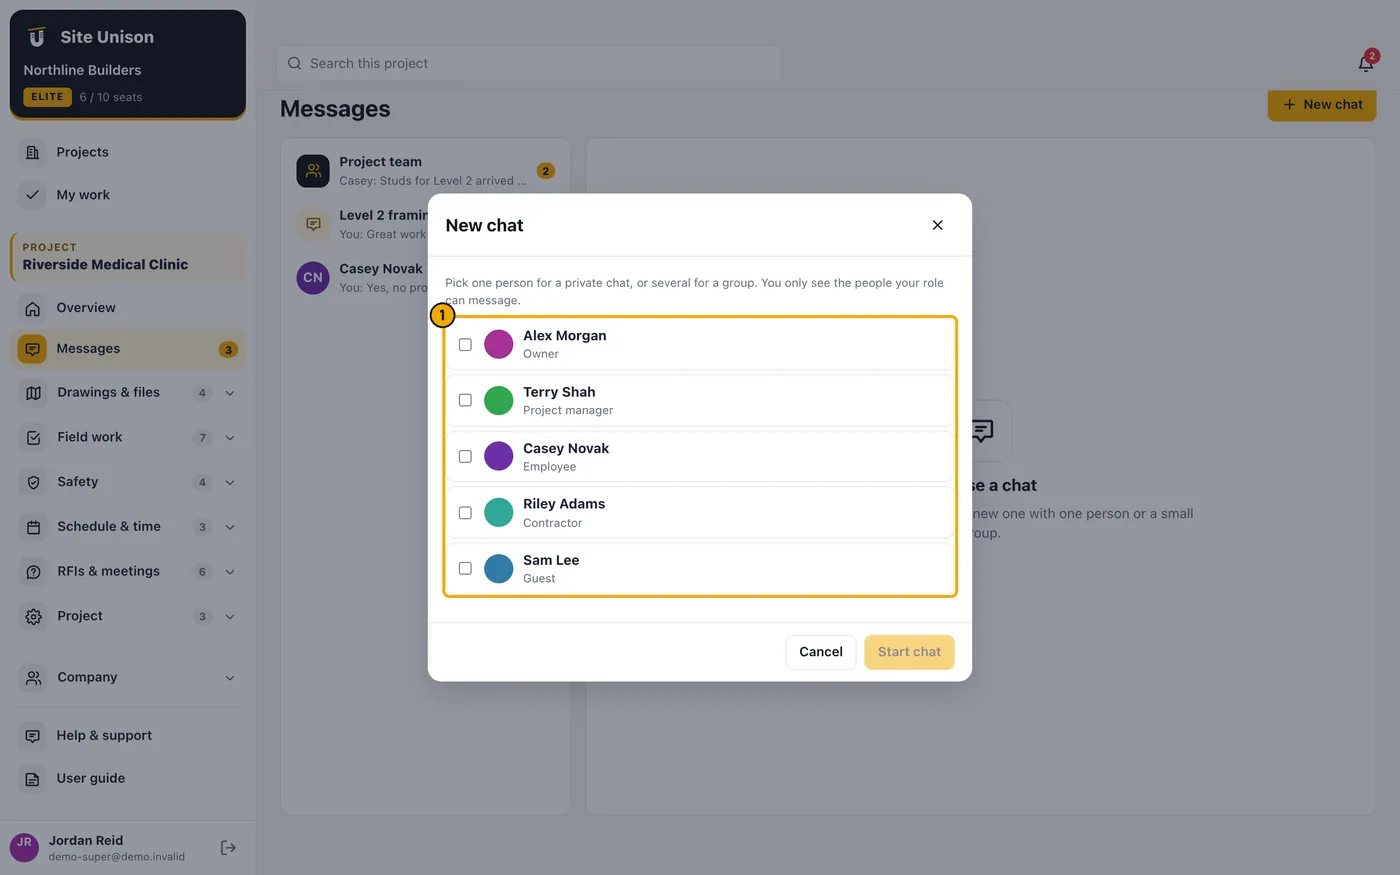
Click New chat, tick one person for a private chat or several for a group, give the group a name and click Start.
Type a message and press Enter. Type @ and a name to notify someone. Use the upload button to send a photo or file.
In a group or the team chat, click People to add someone (or invite a guest into the team chat) or to leave the group.