QuickBooks Online, accounting exports, the AI assistant, single sign-on, API keys and webhooks.
QuickBooks Online
WhereCompany → Company & people → Integrations
PlanElite
WhoOwner connects; owner and project managers sync
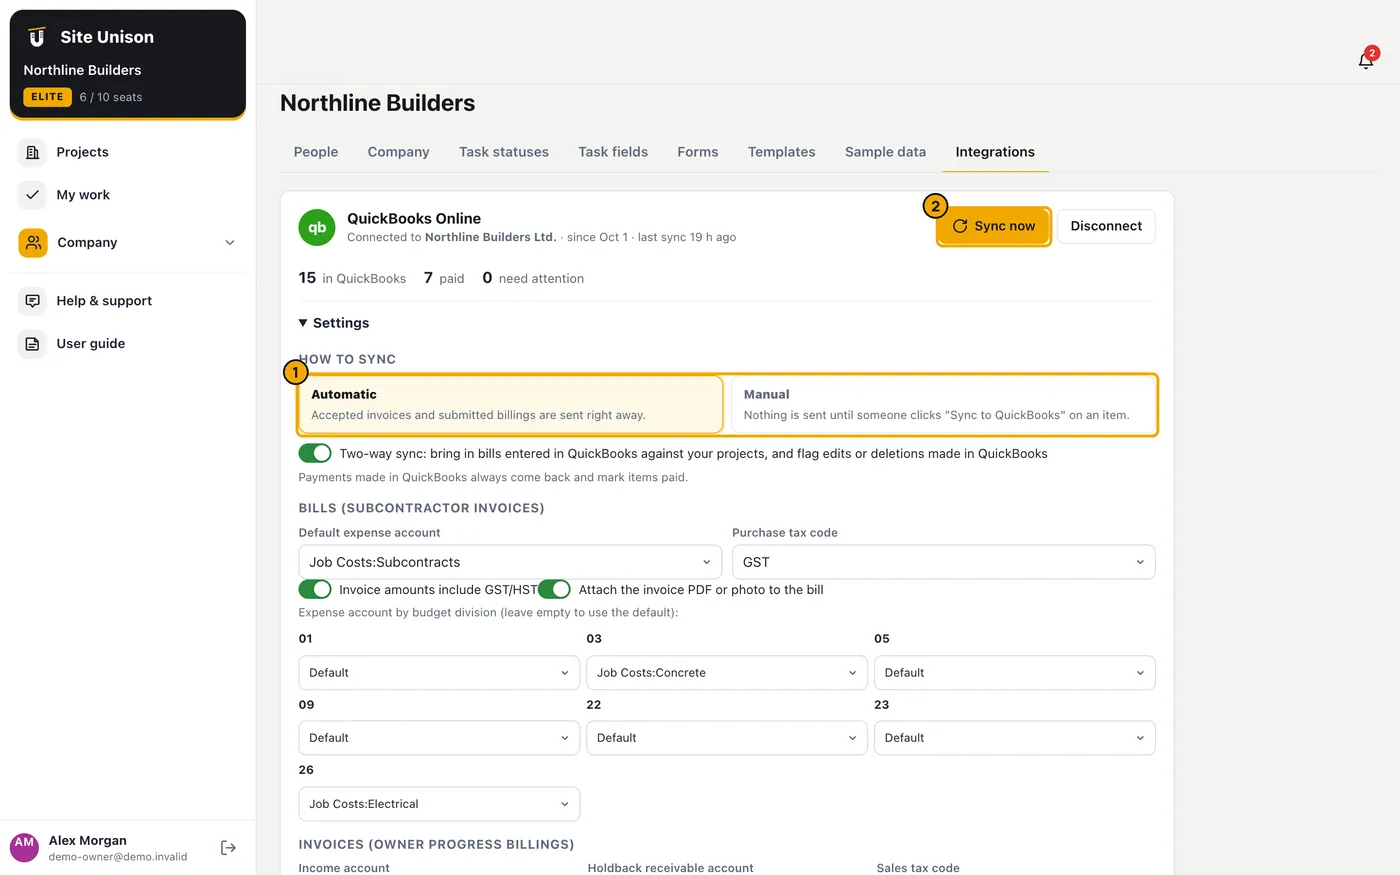
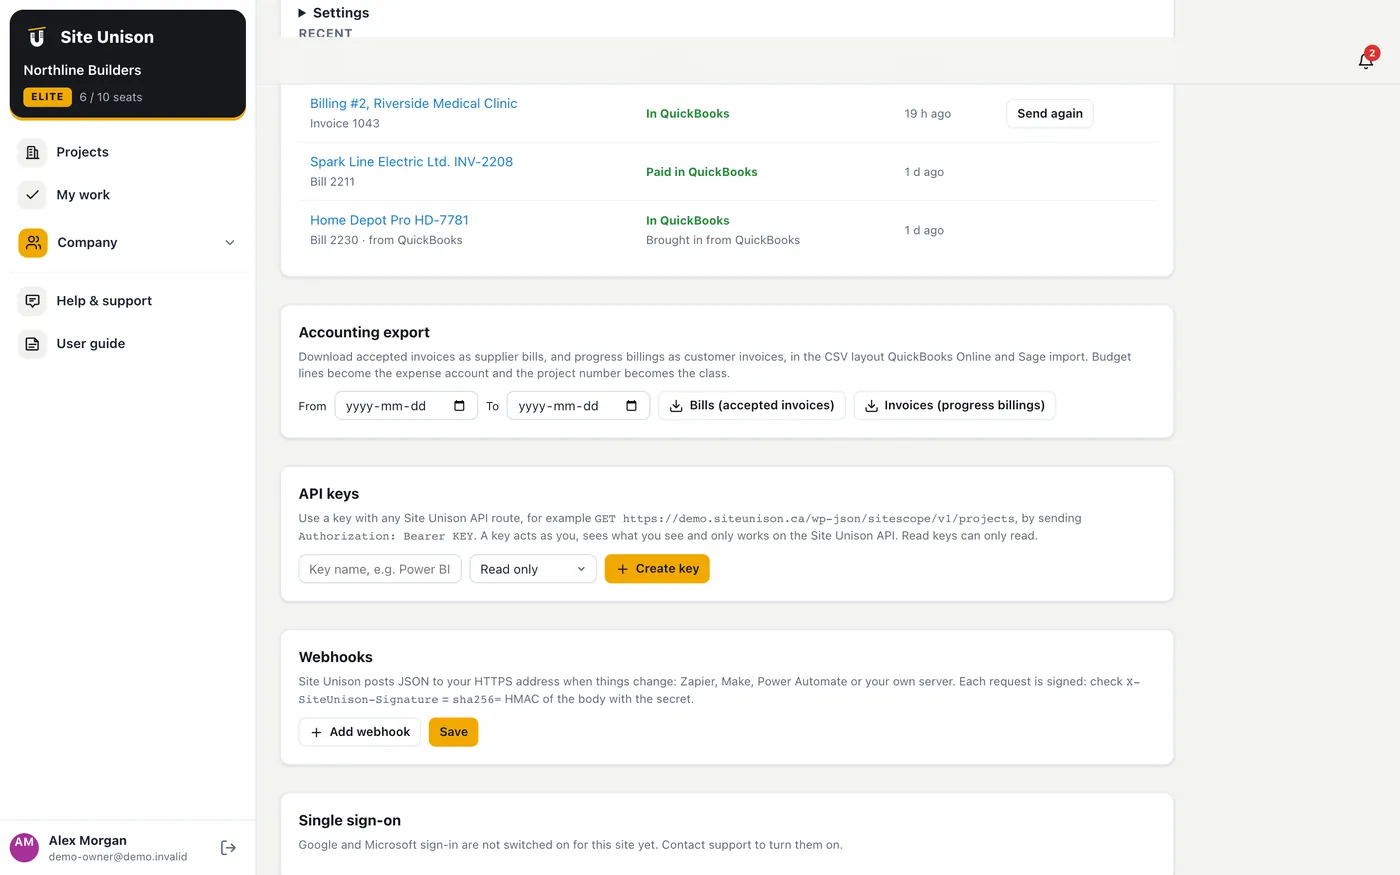
Connect your company's QuickBooks Online. Accepted subcontractor invoices become bills (split by budget division, tagged to the project as a QuickBooks job, with the PDF attached); owner progress billings become invoices with the work this period, holdback as a minus line and GST/HST; and payments made in QuickBooks come back and mark items paid.
Automatic mode sends items as they are accepted or submitted. Manual mode sends nothing until someone clicks Sync to QuickBooks on an item or Sync now. Two-way sync also brings in bills entered directly in QuickBooks against your projects (they become accepted invoices on the matching budget line) and flags bills edited or deleted in QuickBooks.
How to use it
Open Company & people → Integrations and click Connect QuickBooks.
Sign in to Intuit, choose your QuickBooks company and click Connect. You come back to Site Unison.
Under Settings, choose the sync mode and whether to turn on two-way sync.
Choose the default expense account and, if you like, an expense account for each budget division (for example 26 → Electrical). Choose the purchase tax code (GST, HST ON …) and whether invoice amounts include tax.
Choose the income account for progress billings, the holdback receivable account and the sales tax code.
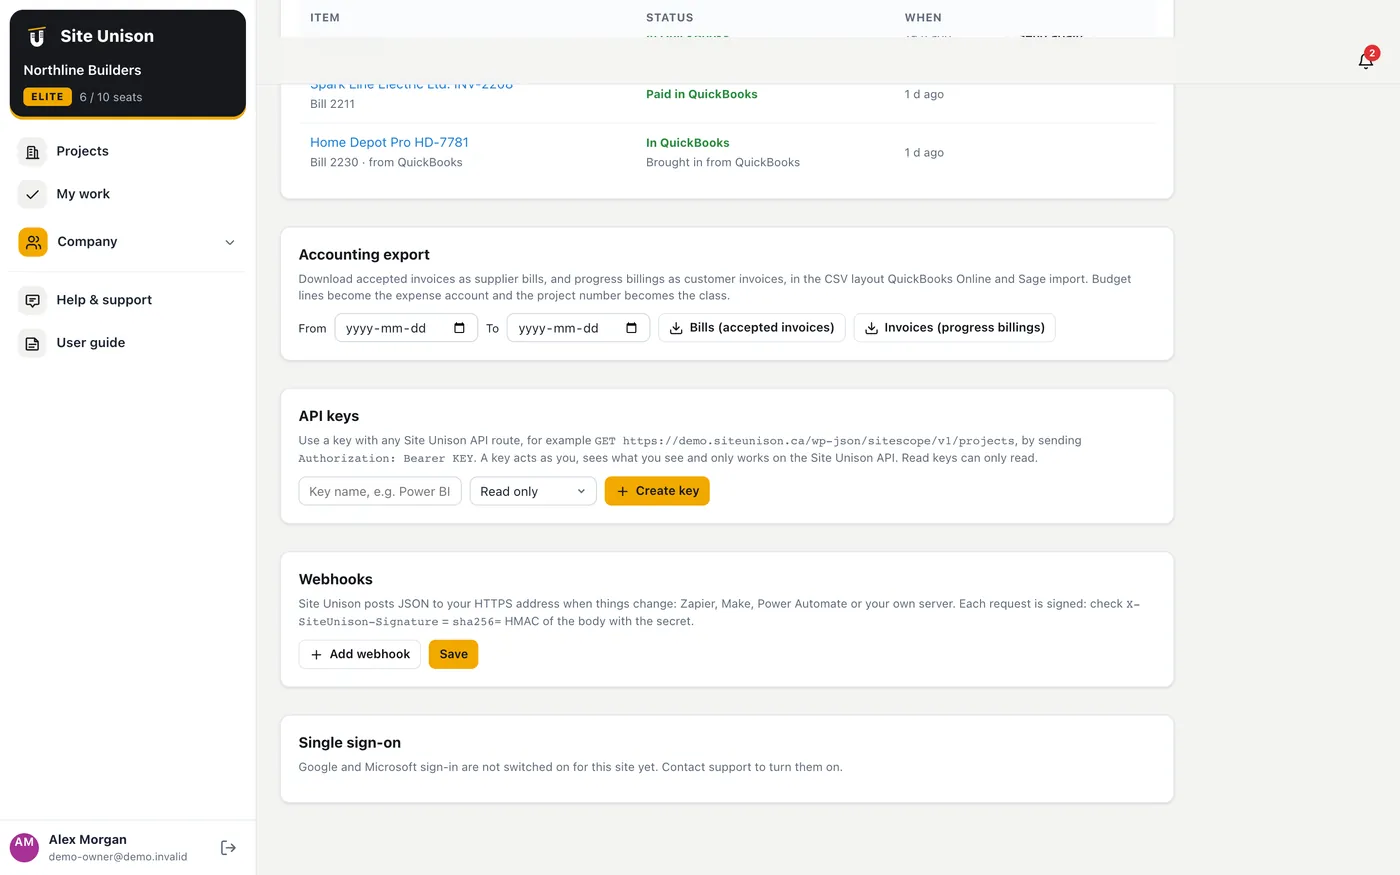
Click Sync now. The recent list shows each item, its QuickBooks number and status; Try again resends an item that needs attention.
On an accepted invoice or a submitted billing, the QuickBooks strip shows the status; click Sync to QuickBooks to send it.
Each project becomes a sub-customer (job) under the owner, so costs and billings land on the job. Disconnecting keeps everything already in QuickBooks; reconnecting the same company picks up where you left off.
QuickBooks setup for the site administrator
WhereWordPress admin → Settings → Site Unison
PlanSite administrator
WhoWhoever runs the Site Unison site
Before any company can connect, the site needs an Intuit app. This is done once.
How to use it
Sign in at developer.intuit.com (free) and create an app for QuickBooks Online and Payments with the Accounting scope.
In the app's Keys & credentials, add the redirect URI shown in WordPress admin → Settings → Site Unison → QuickBooks Online (it ends in ?su_qbo_cb=1).
Copy the Development client ID and secret into the QuickBooks Online box, choose Sandbox, save, and test with a sandbox company (create one in the developer portal; choose Canada for GST/HST).
When ready, complete Intuit's production questionnaire, then paste the Production keys, choose Production and save. Companies connect from Integrations.
Download accepted invoices as supplier bills and progress billings as customer invoices for a date range, in the CSV layout QuickBooks Online and Sage import. Use it for Sage 50 or any system without a live connection.
How to use it
Open Integrations, choose the dates and click Bills or Invoices. Import the file into your accounting system.
AI assistant setup (your own Claude or ChatGPT key)
WhereCompany → Integrations → AI assistant
PlanElite
WhoCompany owner
The AI assistant answers questions about a project, finds risks, drafts RFIs and daily logs and checks submittals against the specification. It runs on your company's own API key from Claude (Anthropic) or ChatGPT (OpenAI). Site Unison does not supply a key: nothing AI-related works until the company owner adds one, and your provider bills your company directly for what you use.
The assistant only works from your Site Unison data. Each request sends the project records, files or photos needed for that one question to your chosen provider, with an instruction to answer only from that data. It does not search the internet, use other projects or fill gaps with outside information. If the answer is not in Site Unison, it says so. Only the owner, project managers and superintendents can use it.
A ChatGPT Plus or Claude Pro subscription does not include API use. API keys come from each provider's developer site and are paid separately, usually as prepaid credit.
How to use it
Get a Claude key: go to console.anthropic.com and sign in or create an account. Under Billing, add a payment method and some credit. Open Settings → API keys, click Create key, name it "Site Unison" and copy it. It starts with sk-ant- and is shown only once.
Or get a ChatGPT key: go to platform.openai.com and sign in. Under Settings → Billing, add a payment method and credit. Open API keys, click Create new secret key, name it "Site Unison" and copy it. It starts with sk- and is shown only once.
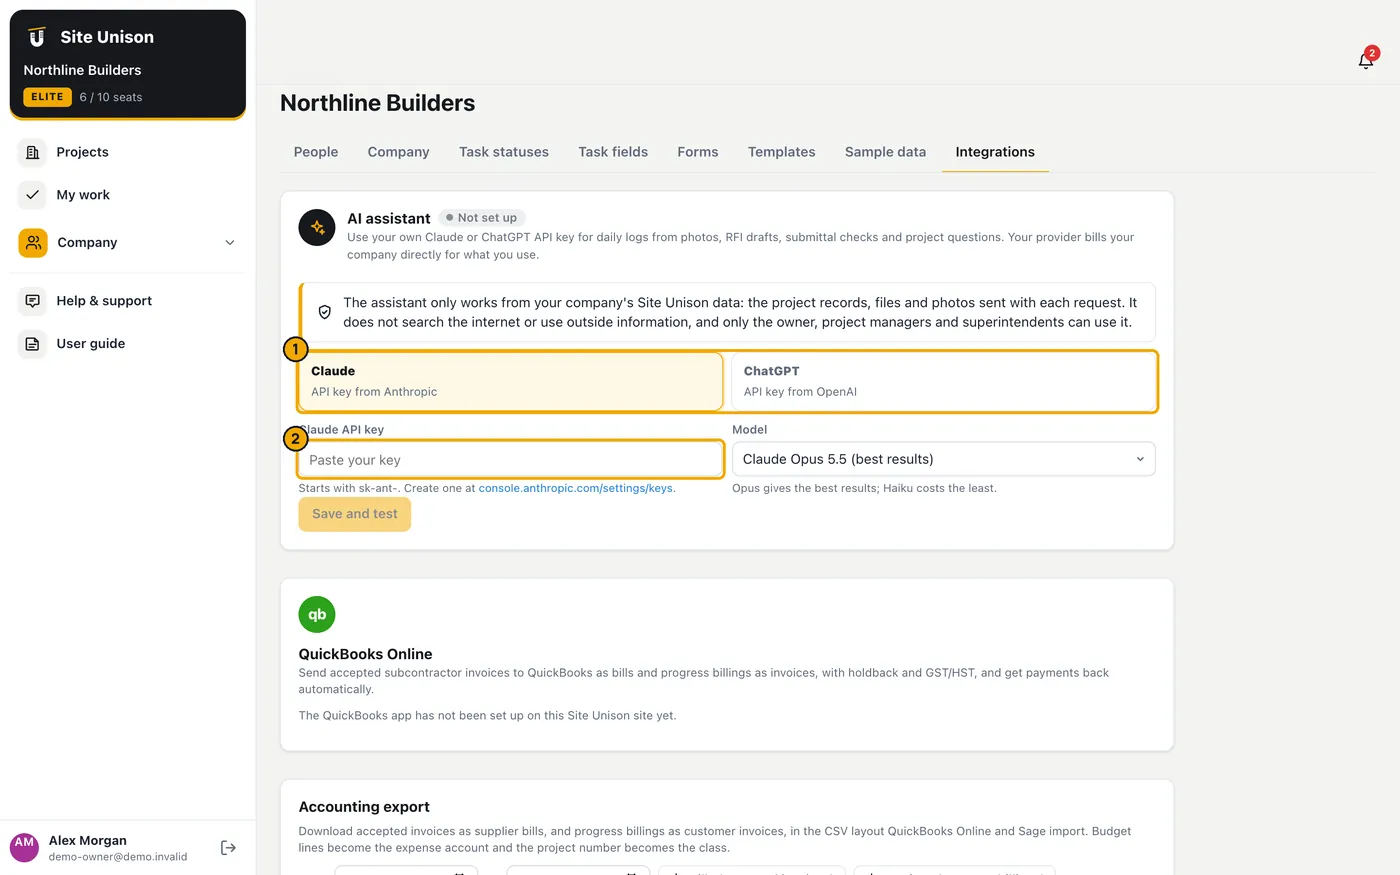
In Site Unison, open Company → Integrations. The AI assistant card is at the top. Choose Claude or ChatGPT.
Paste the key into the key box and choose a model. For Claude, Opus gives the best results and Haiku costs the least. For ChatGPT, leave the model empty to use the default, or type any chat model your OpenAI account can use.
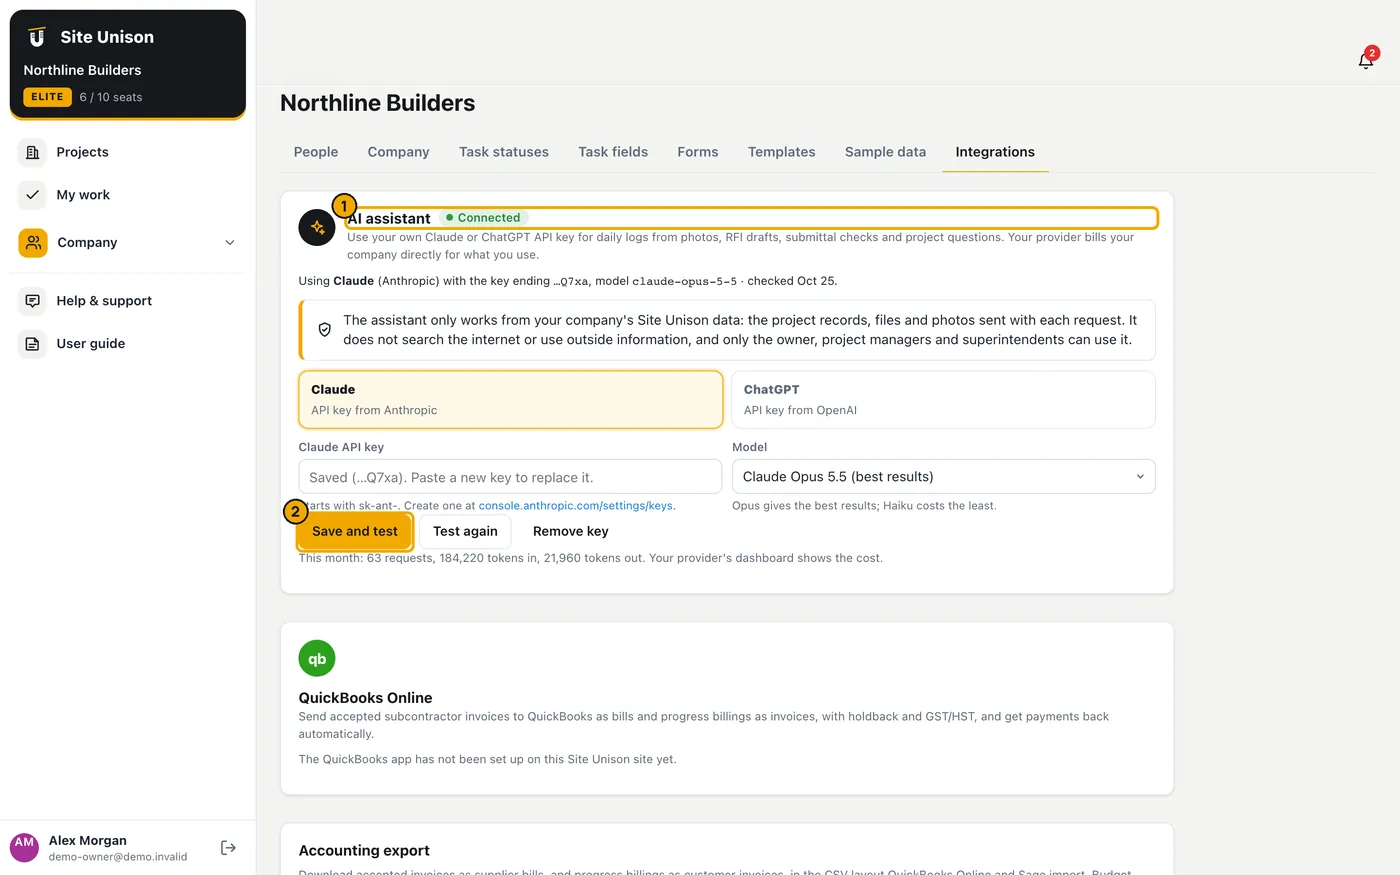
Click Save and test. Site Unison sends a one-word test to your provider. A green Connected label means it worked, and the card shows the last four characters of the key, the model and this month's usage.
Open any project's Overview: the Ask about this project box and the AI buttons on daily logs, RFIs and submittals now work for the owner, project managers and superintendents.
To switch provider or replace the key, paste a new one and click Save and test. Test again re-checks the saved key, and Remove key switches the assistant off for the whole company.
The key is stored encrypted and never shown again in full, even to the owner. Only the company owner can add, change or remove it.
If the card shows Needs attention, read the message: usually the key was revoked, the account is out of credit, or the model is not available on your account.
Watch spending and set limits in your provider's dashboard (Anthropic Console or OpenAI platform). Site Unison shows request and token counts, not prices.
The shared demo site does not accept AI keys, because everyone signs in with the same demo accounts. Use your own Site Unison account.
Single sign-on (Google and Microsoft)
WhereAdmin settings, then Company → Integrations
PlanElite
WhoSite administrator, then the company owner
Let people sign in with Google or Microsoft, and require it for your company email domain.
How to use it
Site administrator: create an OAuth client in Google Cloud Console and an app registration in Microsoft Entra, add the redirect URI shown in Settings → Site Unison → Single sign-on, and paste the client IDs and secrets.
Company owner: open Integrations → Single sign-on, add your email domain and choose whether sign-on is required.
API keys, webhooks and Power BI
WhereCompany → Integrations
PlanElite
WhoOwner
API keys use the same API as the app, limited to what you can see. Webhooks post signed JSON to Zapier, Make, Power Automate or your server when things change. Analytics feeds work in Power BI and Excel.
How to use it
Open Integrations → API keys, name the key, choose read-only or read and write, and click Create key. Copy it now; it is shown once.
Under Webhooks, add the HTTPS address and choose the events. Check the X-SiteUnison-Signature header with the secret.
In Power BI, use Get data → Web with the feed address from Analytics and the API key as a Bearer token.